Tutorial
Introduction
This tutorial shall give an introduction to Ares. During this tutorial, you create a sample project with music and sounds in
the Editor and then use Player and Controller to play it.
Firstly, you should install Ares. Choose the option to install all parts of the program (Editor, Player and Controller).
Project and Background Music
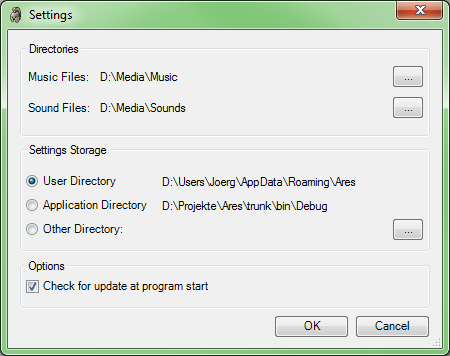
Start the Editor. First choose the directories which contain music and sounds. This is done through the
menu "Extras", "Settings...".
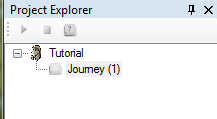
Now, create a new project through the menu "Project", "New...". Enter the name of the project directly, let's take "Tutorial",
and confirm with Return. A first mode has also been created in the project directly, and now you can enter its name. We want
to create music and sounds for a journey over land, so enter "Journey" and confirm again with Return. Now press F3 to select
a key for the mode. Let's take '1', for the 1st mode.
Right-click on the new mode and select "Add Random Music List". Enter "Background Music" as name for the list. An editor has
been opened, and now you can drag fitting music from the music explorer to the list (due to legal considerations, Ares of
course can't package music).
Make a right-click on the music list in the project explorer and choose "Select key...". As key press 'm' for "music".
Background Sounds
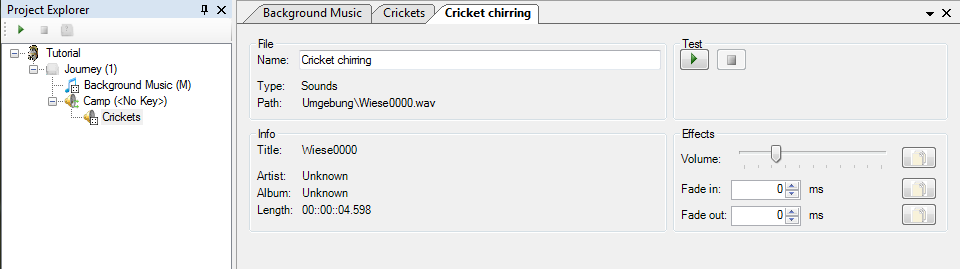
Next, we want to add background sounds for a night under the stars. For that, right-click on the mode and select "Add Background
Sounds". Name them "Camp". A sub-choice is created immediately, call it "Crickets". An editor has also been opened already.
You can drag sound files from the sound explorer to this editor. You can find sounds on the internet, perhaps there will also
be a collection for download with Ares soon. Drag and drop a single file with cricket sounds which you can run endlessly. With
the play button under "Test" you can already try how the chirring will sound in the loop. Double-click on the file. In the new
editor you can enter a different name, e.g. "Cricket chirring". On the right-hand side, you can adjust the volume, it probably
makes sense here to reduce it a bit.
Close the editor with Ctrl+F4. Right-click in te project explorer on the background sounds node and choose "Add Sound Choice".
Name it "Fire" and add an endless fire sound in the same way as with the crickets. We need a second sound choice for the fire
because we don't want to choose randomly between fire and crickets but want to have both active all the time.
Now let's make the night watch a bit anxious. Add another sound choice and call it "Rustling". Add several sounds which contain
rustling of bushes or snapping of twigs like an animal may make. By the way, you can play the files in the sound explorer with
a double-click. These sounds shall also be run in an endless loop, but not all the time, just rarely and randomly. Therefore,
set the start delay to 20.000 ms (fix) / 60.000 ms (random) and set the delay between playing to 10.000 ms (fix) / 30.000 ms
(random). This means that one of the sounds is played the first time after 20 to 80 seconds, and another one will be played
after 10 to 40 seconds.
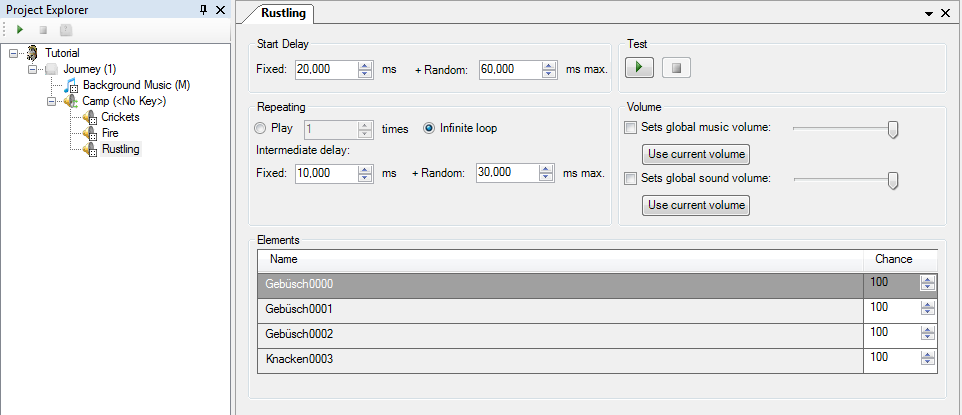
These values are just for the test. Later, you may have to increase them some more, if you want to hear the sounds more rarely.
Alternatively, you could play the rustling sounds explicitly with another "background sounds" element. In that case, you'd
define that they won't be run in an endless loop, but just one or perhaps three times.
Give the background sounds the key 'c' (for "camp"). Its time to listen to them altogether. Select them in the project explorer
and click the play button in the top part of the explorer. Click the stop button when you have listened to the night long enough.
Another Mode
We'll add more to the project now for another situation: a visit to a dungeon. Make a right-click on the project in the project
explorer and select "Add Mode...". Call the mode "Dungeon" and choose the key '2' for it. Right-click on the new mode and select
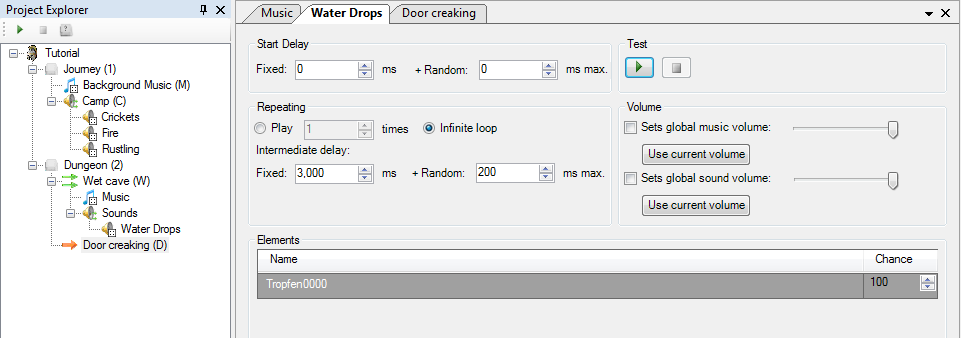
"Add scenario...". A scenario contains both music and background sounds. Call it "Wet cave". Next, you can enter a name for the
sounds. We'd like to have water dripping in the background, so enter "Water drops". First open the music list with a double-click
and add appropriate music. Then open the sound choice and add the sound of water dropping. Use a fixed delay between playing of
3000 ms, so that there's a drop each three seconds. We also want a random delay here, but a rather small one because the dripping
shall be quite regular -- let's take 200 ms. With the play button in the upper right part, you can test it again. When you're
satisfied with the settings, you'll just need a key for the scenario. This time, select "Starting..." from the context menu of the
scenario. In the editor here, you can select the key with the button (e.g. 'w'), and you can also see that the scenario runs
until it is stopped, and that it stops other music and sounds when it is started.
Finally, we'll add the creaking of a door. For that, choose "Add Sequential List..." from the context menu of the dungeon mode,
and call the list "Door creaking". Add the sound and select 'd' as key for the list.
Player
The project is now complete. Save it and start the Player through the "Extras" menu. The "Journey" mode
is already selected because it is the first one in the project. Start the music by pressing 'm' and the camp with 'c' and
enjoy ... Watch how the Player shows what is currently played in its middle part.
Then, change to the other mode by pressing '2'. There's no change yet, because different sounds are played only with the start
of new elements. But if you hit 'w', the music changes to fit the dungeon and the dripping starts in the background. With 'd',
you can let the door creak.
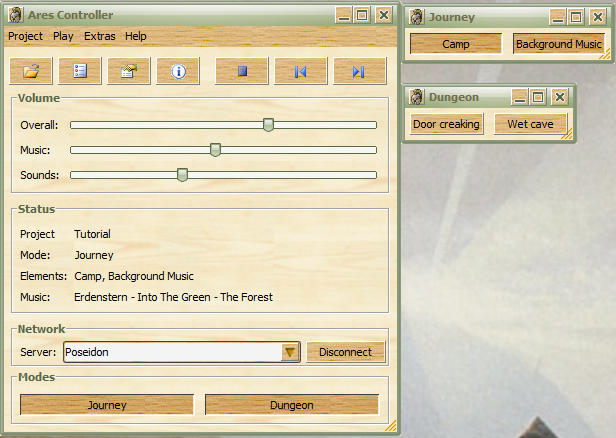
Controller
Stop the Player by pressing 'Esc'. Start the Ares Controller.
In the lower part under "Network" there should be an entry with the name of your computer and the
connection to the Player should be established. The Player also shows this, by the way.
Now, open the windows for Journey and Dungeon with the buttons at the bottom and start / stop the elements with the buttons in
the windows.
In future, you don't need to start the Player explicitly, the Controller will do that for you. Or you can also start the
Controller on a different computer, thus e.g. letting the music play through a HTPC and the
good hi-fi system, while you select the elements with a netbook at the gaming table.